
awesome stuff from 3D Design
wire
THE PRELIMINARY STUFF


THE PROCESS AND FINAL PIECE


PIECE STATEMENT
The objective of this wire project was to "create an individualized expression of a figure in motion." I accomplished this by taking the idea of life, which could be considered the ultimate expression of movement, and representing it by depiction of blood flowing through the heart. More specifically, I created an abstraction of the anatomical heart and then created arrows going in and out of the valves, signifying the blood flow. Because the goal of the project was movement, I purposely constructed the piece with lots of coils that represent directional force by their very nature. This also allows for some literal movement of the piece because the coils are not 100% rigid.
The actual process of using the wire was that of challenge and creative thinking. It was very challenging to work with and manipulate because of the high gauge of the wire. This made it hard to bend in very precise areas and wind the wire. It required creativity to figure out solutions to these problems presented by the physical nature of the wire. I quickly learned that needle nosed pliers allowed for the best manipulation of the wire. I also utilized hot glue to secure different parts of the piece together that did not allow for wire wrapping to secure it. In the end, my project has no perfect straight lines and this causes it to look alive with lots of movement.
For presentation, I chose to leave the piece as it is. I do not want to paint it any color because I want it to be natural. I want it to represent life and movement, and often times the best things in life are the things that come naturally. Trying to alter and change does not always lead to good in life, and so I want to show that in my piece.
plaster
SKETCHBOOK STUFF


IN-PROGRESS


FINAL SHOTS


PIECE STATEMENT
The goal of this project was to use molds and plaster to create texture. This objective immediately made me think of doing something beyond the literal meaning of texture. The idea that I came up with was the texture of a city. Meaning, the different parts of a city that make up the physical aspects of it and create the feeling of the urban environment of a city. In order to accomplish this, I decided to create a sidewalk block, a staircase, and a skyscraper. These all are key parts of any urban environment and make up the “city” texture. While these are not exactly literal textures, I think that they work fantastically as metaphorical textures.
The research I did for this project consisted of walking in Downtown Chicago where I could see first-hand a real urban environment and find some inspiration for the pieces that I wanted to create. It helped because I was able to “feel” the vibes of the city and then use that feeling to create my textures that are supposed to be representative of those vibes. One of the most important things that I took away from looking at Chicago and other images of cities was the concept of grit. Nothing is perfect or pristine, and thus my pieces are not perfectly straight or polished. That would not represent a true city, so I did my best to make them appear worn.
The process of making the plaster pieces was very difficult for me. It was my first time using any of the materials that I used for the project and it caused a lot of frustration that in the end paid off. I had the most trouble creating molds that would not leak. This was because cutting the pieces of foam with perfect edges was very hard to accomplish with the tools I had and thus I had to rely on hot glue and plasticene to plug the leaks. The sand pit also allowed me to bury the molds and not have any leaks.
paper
SKETCHBOOK STUFF


IN-PROGRESS


FINAL SHOTS


PIECE STATEMENT
The objective behind this project was to create something entirely out of paper that resembled a shrine to something, or to create a wearable object. I decided to accomplish this task by creating something dedicated to one of my favorite beverages, coffee. I drink coffee every day and therefore I deemed it important enough to create a “shrine” for. I accomplished this by creating three individual pieces that are to be displayed together that represent coffee. Specifically, I created a coffee mug, a coffee filter, and a lot of coffee beans.
I created the coffee mug by utilizing many accordion folds and then gluing them together to create one long and flexible paper accordion. I then wrapped this into a cylinder shape and attached a small paper handle on the side. I created the coffee filter by using V-pleat folds and gluing them together in a radial fashion. This resulted in a fairly realistic coffee filter. The last component, the coffee beans, was accomplished by creating my own origami shape. Using small strips of paper, about 1/3 of a sheet, I was able to fold them into convincing bean shapes. I made a lot of these and arranged them spilling out of the coffee filter.
Because of the nature of the material used, paper, it was very difficult to think of a design that would capitalize on the flexibility and movement of the paper. Paper is not naturally very strong in terms of structure, and therefore I had to work with what the paper could do. This was my inspiration for making a modular design, that is having individual components, because it would allow for more creative design without having to worry about making the pieces all stick together in the way that I want them to. After figuring that out, I had to problem solve with my lack of paper experience. Meaning, I had to take some time to practice my paper folds and even experiment with them before I could create the folds and objects needed for my final piece. In the end, I successfully learned more about construction with paper and am happy with my final piece and the devotion it shows to coffee.
cardboard
SKETCHBOOK STUFF


IN-PROGRESS


FINAL SHOTS


PIECE STATEMENT
For this project, I was tasked with creating a piece of furniture that could hold the weight of 50 lbs. while being constructed with cardboard. At first, this task seemed like it would be very difficult because cardboard is not as strong as something like wood, which is what furniture is usually made from. I decided to accomplish the task by creating a smaller piece of furniture, namely a bench, because by the object being smaller it would also be stronger.
More specifically, I used a triangle for the main body of the bench because I knew that triangles are the strongest shape in terms of engineering. I then created legs out of laminated cardboard sheets which resulted in very strong pieces that would not bend and buckle. So with a triangular shape for the body, and laminated legs, I needed to then address the sitting surface of the bench. I did this by making a structure of interlocking pieces that would distribute the weight of a person sitting across the body, and then down into the laminated legs. It was successful and can take my whole body weight sitting on it.
Working with the new material of cardboard was a challenge that took some getting used to. Because one piece of cardboard consists of folder sheets of paper that are folded in a wave fashion across the board, it was important to utilize the sheets in such a way that the waves of paper would be vertical and not horizontal, therefore adding structural integrity to the bench, if even in a very small way. Unfortunately I did not know about this aspect of cardboard when I began the project, so only part of the bench was not constructed with this in mind. In the end it was still successful in its goals and servers as a cardboard bench that is fully functional.
wood
SKETCHBOOK STUFF


IN-PROGRESS


FINAL SHOTS


PIECE STATEMENT
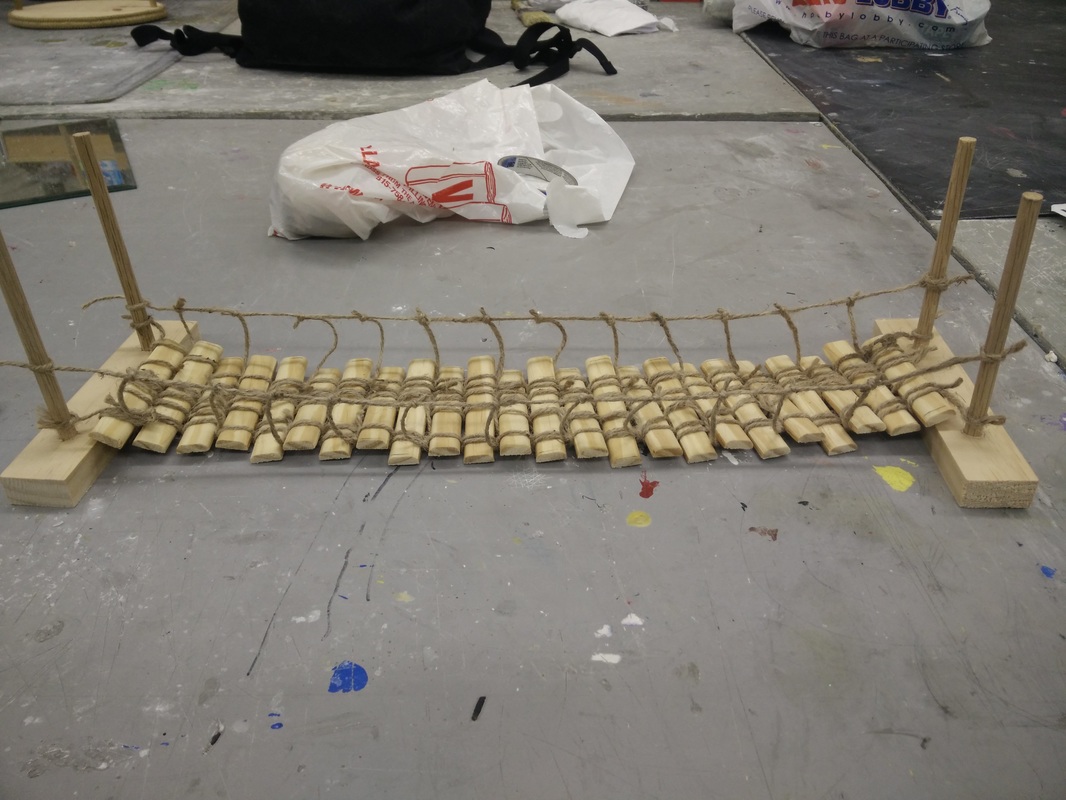
For the final project, the goal was to create something out of wood that utilized both hard and soft materials. So, in addition to wood, something had to be used in unity with the hard wood that would create something that could be viewed as hard, soft, or both. It also had to be a size of at least two feet in any direction.
To accomplish this task, I first started thinking about what I could possible create that would be a blend of hard and soft fabrics. I knew that I had to use some type of wood, but I still had the option of whatever soft material I would use. For whatever reason I figured that some type of rope or string would be a fun material to use. With this concept of using wood in conjunction with a rope or string, I instantly thought of a rope bridge. Specifically, the kind of rope bridge you would see Indiana Jones crossing in one of his perilous adventures. So, I then set out to create this rope bridge.
In order to create the bridge, I knew that I would need many wood “planks” and some sort of rope. In order to figure out what exactly I would use, I headed to a hardware store and browsed the inventory. I found a long piece of wood cut to ¾”, and then a large supply of twine. The wood would be perfect, because it was the perfect width for the scale of my bridge and all I would have to do to it was cut it in the certain lengths that I wanted each plank to be. The twine was also the perfect material for my project because it resembled the ancient rope you would see on a rope bridge. I also purchases a wooden dowel rod which would be used for the anchors of the bridge. With these materials I was able to construct the bridge and meet the goal I set out to achieve. It is also important to note that it was created entirely out of the wood and twine, with no glue or adhesive used in any part.
